
Fiber-to-the-Home (FTTH) technology is revolutionizing internet connectivity. However, the closed devices provided by internet service providers often restrict users’ freedom. If you have a router or switch with an SFP+ interface, such as the Ubiquiti Dream Machine Pro, Mikrotik CCR series, or an OPNsense device, the XGSPON ONU Stick SFP+ can help you bypass these limitations and connect directly to the fiber-optic network using your hardware. This article provides a comprehensive guide, covering everything from hardware preparation to detailed configuration and troubleshooting, helping you unlock the full potential of fiber-optic technology.
What is the XGSPON ONU Stick SFP+?
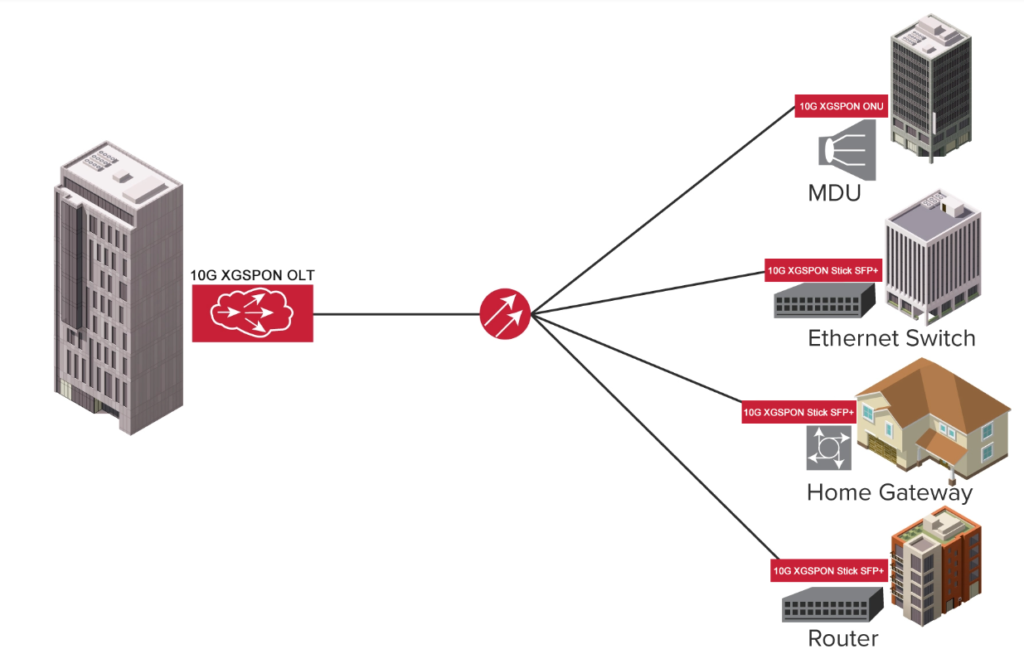
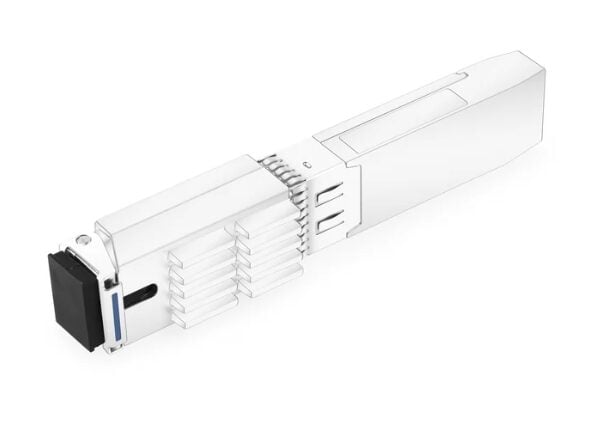
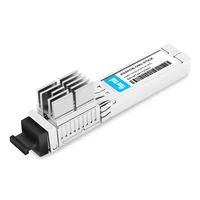
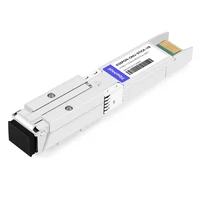
The XGSPON ONU Stick SFP+ is a compact Optical Network Unit (ONU) designed in an SFP+ (Small Form-factor Pluggable Plus) form factor, supporting speeds of up to 10Gbps. It integrates the reception and conversion of fiber-optic signals, translating XGSPON or XGS-PON protocol signals into Ethernet output, which can then be directly connected to your router or switch.
Unlike traditional ONUs, this module requires no additional power or Ethernet cable; it works by simply plugging into the SFP+ port of the device. Built on the XGS-PON standard (ITU-T G.9807.1), it provides symmetrical 10Gbps upstream and downstream rates, making it ideal for high-bandwidth activities like 4K/8K video streaming, cloud gaming, or enterprise networking.
Why Choose the XGSPON ONU Stick?
- High Performance: Supports symmetrical 10Gbps speeds, far exceeding GPON technology (2.5Gbps down / 1.25Gbps up).
- Flexibility: Enables advanced functions like custom firewalls, traffic shaping, or multi-WAN load balancing when paired with your router.
- Efficiency: Eliminates the need for standalone ONU devices, reducing cables and power consumption (typically around 3W).
- DIY Enthusiasm: Appeals to network enthusiasts who enjoy pushing the boundaries of fiber-optic technology.
Preparations Before Use
Before getting started, ensure you have the following items and information:
Hardware:
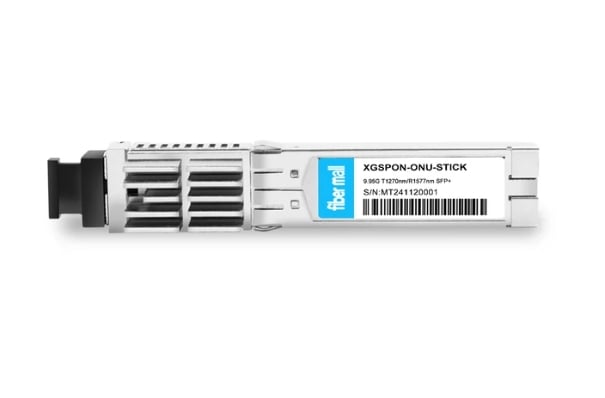
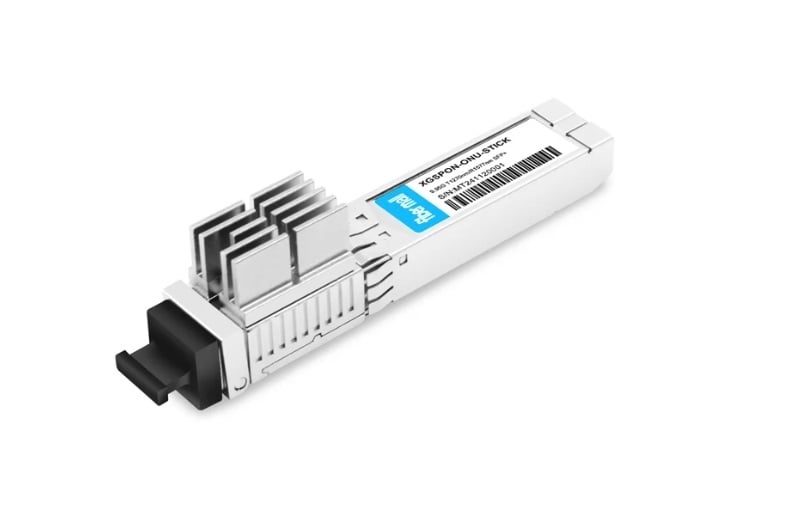
- XGSPON ONU Stick SFP+ Module: Popular models include the XGSPON-ONU-STICK (based on MaxLinear PRX126 chipset), available from platforms like FibreMall or Amazon, priced between $160–300 USD.
- SFP+ Compatible Device: Examples include the Ubiquiti UDM-Pro, Mikrotik CCR2004-1G-12S+2XS, or a PC with an SFP+ port (which may require a network card).
- Fiber-Optic Cable: A single-mode fiber cable with an SC/APC connector (usually provided by your ISP, with length depending on the splitter location).
- Computer: For configuring the module, preferably with an Ethernet interface.
Network Parameters:
- PON Serial Number (SN): A 12–16 alphanumeric code to identify your ONU.
- Logical ID (LOID) and Password: Used by some ISPs (e.g., China Telecom); these can be extracted from your original device.
- VLAN ID: For instance, Virgin Media uses VLAN 0, while AT&T uses VLAN 100.
- Authentication Method: PPPoE, DHCP, or Static IP, depending on your ISP.
Tools & Software:
- Ethernet Cable: To connect your computer to the router.
- Browser: To access the module’s management interface.
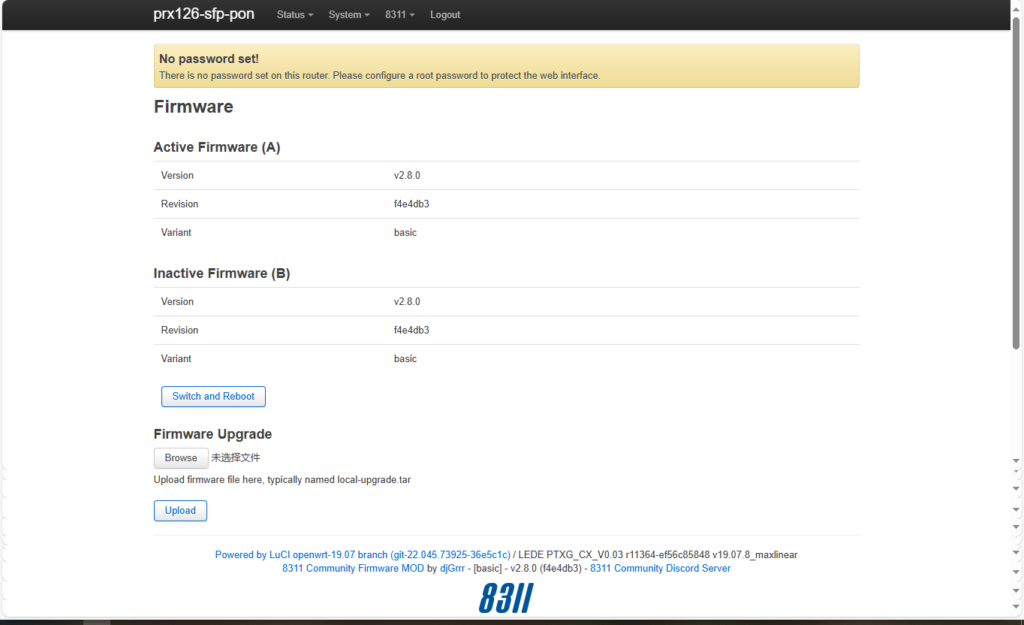
- Firmware: While factory firmware might have limitations, the 8311 community firmware is recommended for additional features.
Detailed Steps for Using the XGSPON ONU Stick SFP+
The following guide uses the XGSPON-ONU-STICK as an example, assuming you have already acquired the module and set up a fiber-optic environment.
1. Hardware Connection
- Insert the Module: Plug the XGSPON ONU Stick into the SFP+ port of your router, ensuring it is firmly inserted. Note that some devices, such as Mikrotik routers, may require a reboot after the module is installed to be recognized.
- Connect the Fiber: Insert one end of the SC/APC fiber-optic cable into the module and connect the other end to the ISP’s fiber splitter (ODP or fiber distribution box). Ensure the fiber remains clean and avoid excessive bending.
- Check the LED Indicator: The module typically has an LED light. A steady green light indicates normal operation, while blinking or no light may signal a problem with the connection.
2. Access and Initial Configuration
- Set the Computer’s IP Address:
Open the network settings and configure the IP address to 192.168.11.100, with a subnet mask of 255.255.255.0, and leave the gateway blank.
The module’s default IP address is usually 192.168.11.1.
- Log In to the Management Interface:
Enter http://192.168.11.1 into a browser.
Use the default username and password to log in (commonly root/root, admin/admin, or root with a blank password; refer to the module manual for specifics).
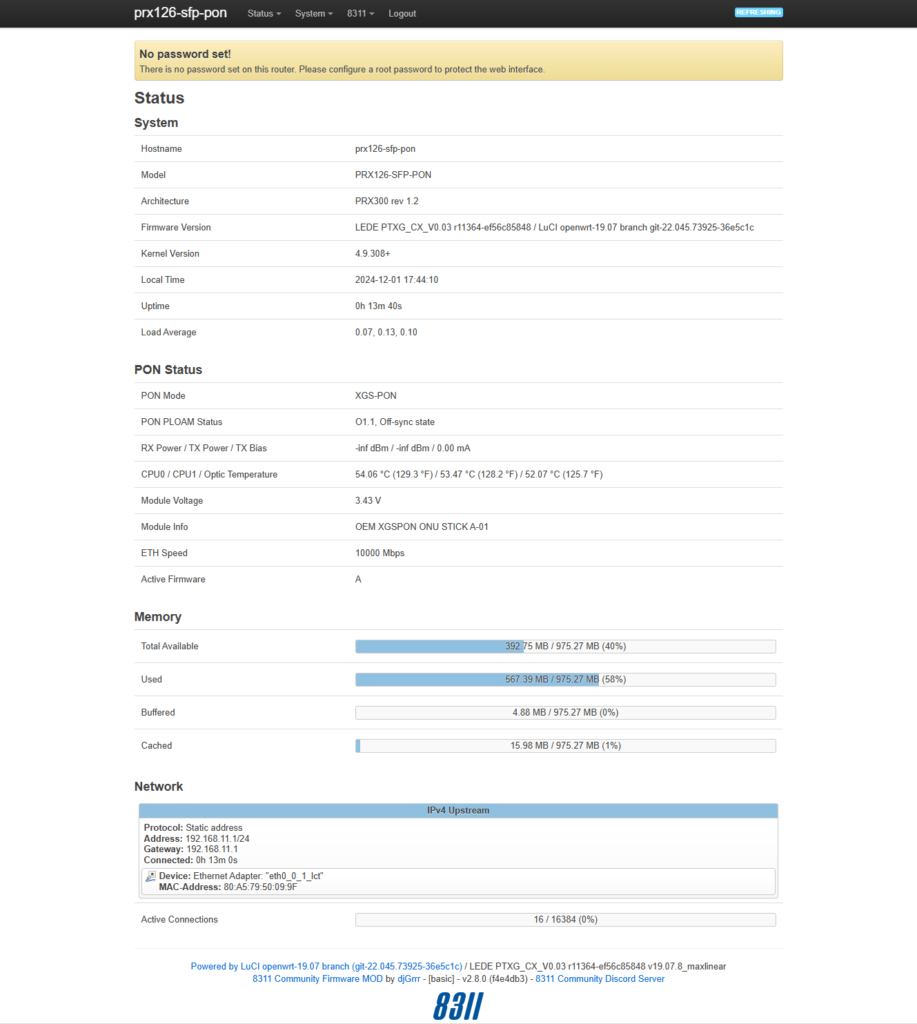
- Check Status:
Navigate to “PON Status” or “Optical Info” to verify the optical signal strength. The Rx Power should range from -27dBm to -8dBm, and the Tx Power should be approximately 0-5dBm.
3. Input Network Parameters
- PON Configuration:
Enter the PON Serial Number (SN) under “PON Configuration” or “WAN Settings.”
If required, input the Logical ID (LOID) and password into the respective fields.
- VLAN Settings:
If a specific VLAN (e.g., 100) is required by your ISP, enable VLAN mode and input the ID.
For modules supporting “Transparent Mode,” VLAN configuration may be skipped.
- Save and Reboot:
Click “Apply” or “Save,” then reboot the module (this may take 1–2 minutes).
After rebooting, check the “Registration Status.” A “Registered” status confirms successful synchronization with the OLT.
4. Router Configuration
- Set the WAN Port:
Log in to your router interface and assign the SFP+ port as the WAN port (e.g., sfp-sfpplus1 for Mikrotik devices).
- WAN Connection Type:
For PPPoE, enter the ISP-provided username and password.
For DHCP, configure the router to automatically obtain an IP.
For static IP, manually input the IP address, gateway, and DNS.
- VLAN Settings:
If the module does not handle VLAN, configure it within the router (e.g., interface vlan 100).
- Test the Connection:
After saving the settings, verify that the router has obtained a public IP address and can ping external addresses (e.g., 8.8.8.8).
5. Optimization and Monitoring
- Optimize Signal:
Log in to the module to check optical power levels. If the Rx Power is below -27dBm, inspect the fiber connection or splitter.
- Manage Heat:
The module may reach temperatures of 50–70°C during operation. Place it in a well-ventilated area or attach a heatsink with thermal adhesive.
- Upgrade Firmware:
If the factory firmware is incompatible, install the 8311 community firmware (via TFTP or web upload; see pon.wiki for tutorials).
- Inspect Logs:
Check module logs to ensure no frequent disconnections or error messages.
Troubleshooting
- OLT Registration Failure:
Verify the SN, LOID, and password.
Ensure the fiber signal is normal (use a power meter to test the splitter output).
Consider upgrading the firmware.
- Router Does Not Recognize the Module:
Update the router firmware or manually enable SFP+ support (e.g., use the Mikrotik command: interface ethernet set sfp-sfpplus1 auto-negotiation=no speed=10Gbps).
- Slow Speed:
Check that the SFP+ port is locked at 10Gbps.
Confirm that the ISP-provided bandwidth meets the 10Gbps standard.
- Overheating:
Add a heatsink or lower the ambient temperature.
Technical Background & Advanced Tips
- XGS-PON protocol: Uses Wavelength Division Multiplexing (WDM)—1577nm downstream, 1270nm upstream.
- Firmware options: The 8311 community firmware adds support for Nokia, Huawei OLTs, and fixes issues like RX_LOS errors.
- Parameter extraction: Use a serial tool (e.g., PuTTY) to extract SN from old ONUs or analyze authentication via Wireshark.
Important Notes
- Risks: Firmware flashing may brick the module—back up original firmware and proceed cautiously.
- Purchase advice: Buy from reputable sellers to avoid counterfeit products.
Conclusion
The XGS-PON ONU Stick SFP+ is a powerful, compact solution to take control of your fiber connection. While setup requires technical know-how, this guide should help you master it. For non-technical users, FibreMall offers pre-flashed 8311 firmware versions for plug-and-play simplicity.
Whether chasing peak performance or embracing DIY networking, this tool is worth exploring.
Questions or experiences to share? Leave a comment below! Let’s unlock the limitless potential of fiber together.
Related Products:
-
 XGSPON ONU Stick Compatible WAS-110 SFP+ TX-9.95G/RX-9.95G TX-1270nm/RX-1577nm SC/APC DDM Optical Transceivers
$160.00
XGSPON ONU Stick Compatible WAS-110 SFP+ TX-9.95G/RX-9.95G TX-1270nm/RX-1577nm SC/APC DDM Optical Transceivers
$160.00
-
 XGSPON ONU Stick SFP+ with MAC TX-9.95G/RX-9.95G TX-1270nm/RX-1577nm SC/APC DDM Industrial Optical Transceivers,8311 Firmware Version
$160.00
XGSPON ONU Stick SFP+ with MAC TX-9.95G/RX-9.95G TX-1270nm/RX-1577nm SC/APC DDM Industrial Optical Transceivers,8311 Firmware Version
$160.00
-
 XGSPON ONU Stick SFP+ Supporting MAC Compatibility for Cisco 10G Switches and Routers: C9500, 92160YC, and Others,8311 Firmware Version
$160.00
XGSPON ONU Stick SFP+ Supporting MAC Compatibility for Cisco 10G Switches and Routers: C9500, 92160YC, and Others,8311 Firmware Version
$160.00
-
 XGSPON ONU Stick SFP+ Supporting MAC Compatibility for Aruba 10G Switches and Routers: 6200F-24G and Others,8311 Firmware Version
$160.00
XGSPON ONU Stick SFP+ Supporting MAC Compatibility for Aruba 10G Switches and Routers: 6200F-24G and Others,8311 Firmware Version
$160.00
-
 XGSPON ONU Stick SFP+ Supporting MAC Compatibility for H3C 10G Switches and Routers: S6520 and Others,8311 Firmware Version
$160.00
XGSPON ONU Stick SFP+ Supporting MAC Compatibility for H3C 10G Switches and Routers: S6520 and Others,8311 Firmware Version
$160.00
-
 XGSPON ONU Stick SFP+ Supporting MAC Compatibility for Huawei 10G Switches and Routers: S6520 and Others,8311 Firmware Version
$160.00
XGSPON ONU Stick SFP+ Supporting MAC Compatibility for Huawei 10G Switches and Routers: S6520 and Others,8311 Firmware Version
$160.00
-
 XGSPON ONU Stick SFP+ Supporting MAC Compatibility for Intel 10G NICs: X520-DA2, 82599ES 10G SFP+ NIC, and X710-BM2,8311 Firmware Version
$160.00
XGSPON ONU Stick SFP+ Supporting MAC Compatibility for Intel 10G NICs: X520-DA2, 82599ES 10G SFP+ NIC, and X710-BM2,8311 Firmware Version
$160.00
-
 XGSPON ONU Stick SFP+ Supporting MAC Compatibility for Mellanox 10G NICs: MCX512A-ACUT and Others,8311 Firmware Version
$160.00
XGSPON ONU Stick SFP+ Supporting MAC Compatibility for Mellanox 10G NICs: MCX512A-ACUT and Others,8311 Firmware Version
$160.00
-
 XGSPON ONU Stick SFP+ Supporting MAC Compatibility for MikroTik 10G Switches and Routers: CCR2004-16G-2S+ and CRS326-24G-2S,and Others,8311 Firmware Version
$160.00
XGSPON ONU Stick SFP+ Supporting MAC Compatibility for MikroTik 10G Switches and Routers: CCR2004-16G-2S+ and CRS326-24G-2S,and Others,8311 Firmware Version
$160.00
-
 XGSPON ONU Stick SFP+ Supporting MAC Compatibility for Netgate 10G Switches and Routers: 6100, 8200, and Others,8311 Firmware Version
$160.00
XGSPON ONU Stick SFP+ Supporting MAC Compatibility for Netgate 10G Switches and Routers: 6100, 8200, and Others,8311 Firmware Version
$160.00
-
 XGSPON ONU Stick SFP+ Supporting MAC Compatibility for TP-Link 10G Switches and Routers: Archer BE900, Archer BE800, and Omada ER8411,and Others,8311 Firmware Version
$160.00
XGSPON ONU Stick SFP+ Supporting MAC Compatibility for TP-Link 10G Switches and Routers: Archer BE900, Archer BE800, and Omada ER8411,and Others,8311 Firmware Version
$160.00
-
 XGSPON ONU Stick SFP+ with MAC Address Configuration Compatible with Ubiquiti 10G Series Switches: UDM Pro, UDM Pro Max, and Cloud Gateway Fiber, and Others,8311 Firmware Version
$160.00
XGSPON ONU Stick SFP+ with MAC Address Configuration Compatible with Ubiquiti 10G Series Switches: UDM Pro, UDM Pro Max, and Cloud Gateway Fiber, and Others,8311 Firmware Version
$160.00