
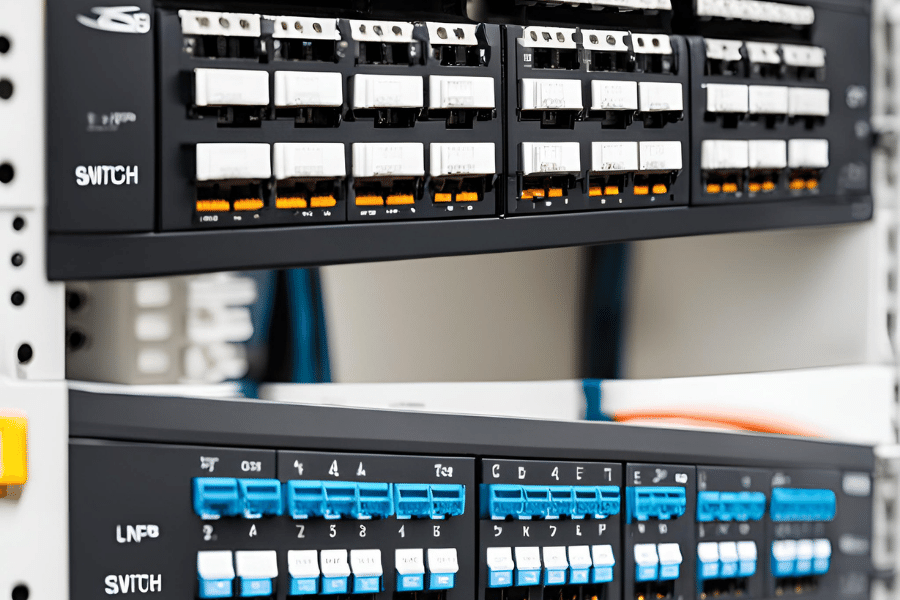
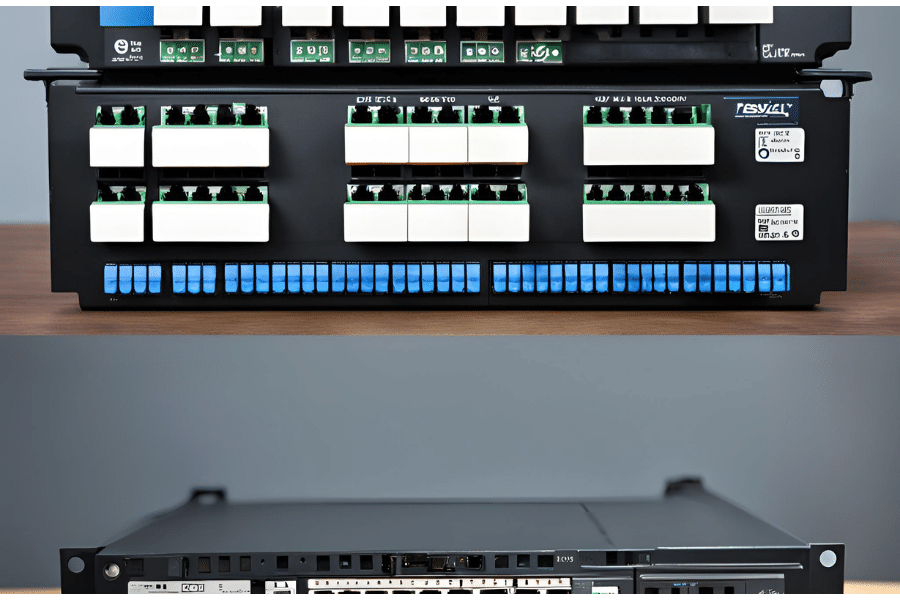
When you are setting up and designing a network, it is important that you know what a switch and a patch panel do if you want the best performance and reliability. Both act as key parts of structured cabling systems but have different roles. A passive device used mainly for managing network cables is referred to as a patch panel. This provides cable termination from various locations, which can be routed flexibly and efficiently using short patch cords. These units do not directly affect data traffic – all data passing through them is left unaltered. They should be used when creating adaptable networks that are easy to maintain, especially where changes or upgrades may be required frequently in the future.
On another note, switches are active devices responsible for network traffic management. Upon receipt of incoming data packets, they examine MAC addresses and then forward each packet to its correct destination intelligently. Through this feature, congestion on the network can be minimized while maximizing throughput. There are different types of switches, which vary with the number of ports offered, port speed, and other additional functionalities like Quality Of Service (QoS), Power Over Ethernet (PoE), or Layer 3 routing capability. Knowing the differences between them and understanding where each one should be used can greatly enhance efficiency during network installations in terms of scalability, too.
What is a Patch Panel, and Why is it Important?
Understanding the Patch Panel
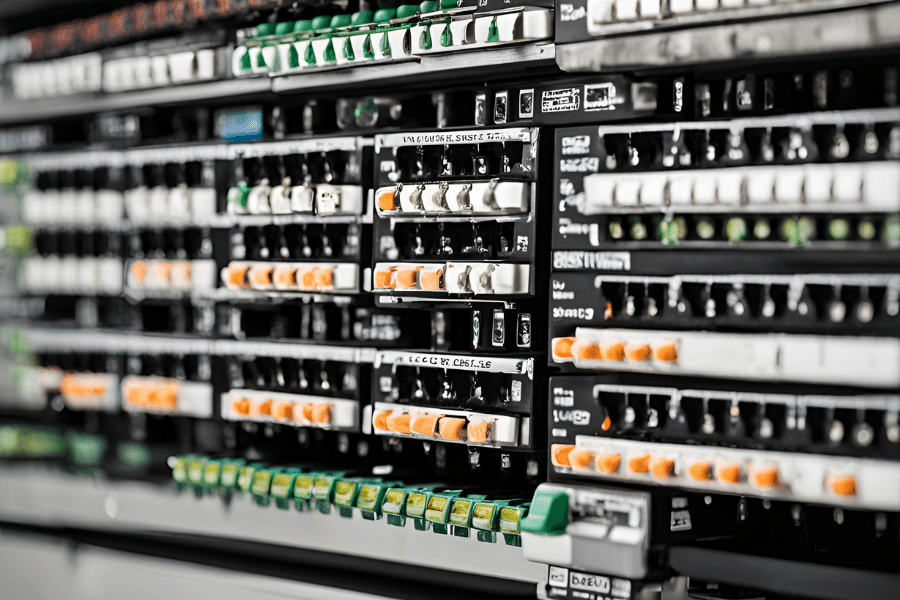
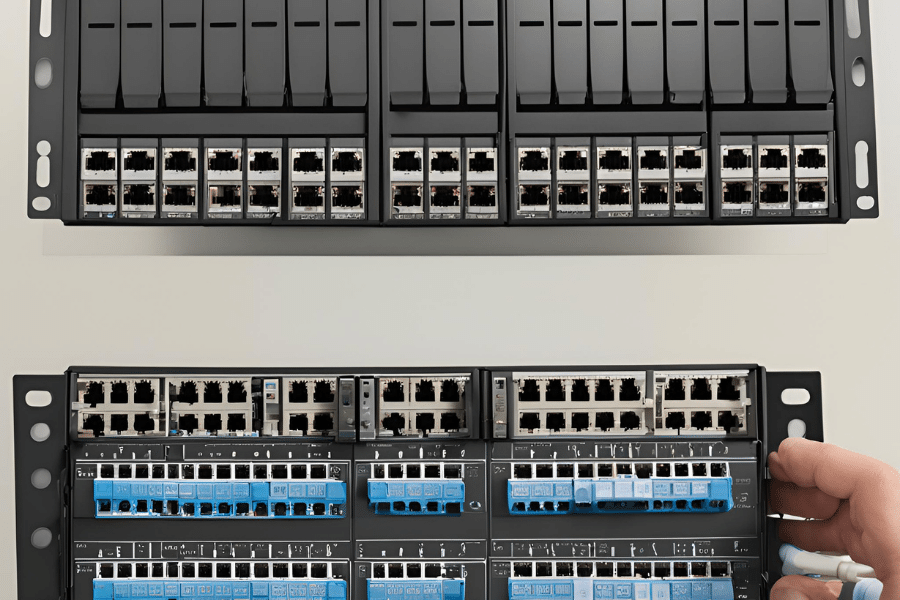
A patch panel is an integral part of network infrastructure for arranging and maintaining network cables in the best way possible. It is a central termination point where all horizontal cables leading to different workstations or devices are terminated. Each cable is terminated on a port at the patch panel, which can then be connected to networking equipment, such as switches, using short patch cables. This arrangement allows easy re-routing, troubleshooting, and maintenance without directly affecting the permanent cabling system. Patch panels provide an organized and scalable approach to cable management, thereby significantly ensuring that networks are reliable and can be upgraded easily when necessary.
Different Types of Patch Panels
To select the right solution for a given network infrastructure, one must know about different patch panels. Here are some of them:
Unshielded Twisted Pair (UTP) Patch Panels:
- Objective: Generally used in places where there is low electromagnetic interference (EMI).
Technical Specifications:
- Category rating (e.g., Cat5e, Cat6, Cat6a)
- Number of ports: usually 24 or 48
- Reasoning: UTP patch panels are cost-effective and provide good performance in standard LAN environments.
Shielded Twisted Pair (STP) Patch Panels:
- Objective: Employed at sites with high EMI levels that may cause signal degradation if not protected against.
Technical Specifications:
- Shielding type: Foil or braided
- Category rating: Typically available in Cat6, Cat6a, and higher
- Number of ports: usually 24 or 48
- Reasoning: It ensures data integrity by shielding against electrical noise.
Fiber Optic Patch Panels:
- Objective: Intended for high-speed fiber optic networks; they house connections and facilitate cable management.
Technical Specifications:
- Connector types: LC, SC, ST, MPO/MTP
- Port capacity: small (12 ports) to large (up to 144 ports or more)
- Reasoning: They enable long-range support of bandwidth-intensive applications with little signal loss.
Modular Patch Panels:
- Objective: Allows installation of different module types (e.g., UTP, STP, fiber), thus providing flexibility.
Technical Specifications:
- Port configuration depends on the installed modules
- Compatibility supports various modules such as RJ45s or fiber optics etcetera)
- Reasoning: These panels can be used in mixed-media environments as they offer versatility and scalability.
High-Density Patch Panels:
- Objective: Saves space in data centers and large network installations where real estate is limited.
Technical Specifications:
- Port density can support up to 96 ports in a 1U rack space
- Reasoning: They allow for maximum port count in the smallest possible area when many devices need to be connected.
If network professionals understand patch panel types and their corresponding technical parameters, they will be able to ensure the best performance, reliability, and scalability for different network setups.
Key Benefits of Using a Patch Panel
- Revamped Understanding: Patch panels are a great place for network cable management since they decrease clutter and improve the organization of network connections. It is important to note that this method makes the maintenance process of network infrastructure easier.
- More Flexibility: Using them, a person can quickly reconfigure network connections without having to touch the end devices directly. This helps meet changing network needs and support different media types, which makes integration with new technologies or devices much easier.
- Ease of Troubleshooting: Patch panels are second to none in terms of simplifying the diagnosis and resolution of network problems. Technicians can identify faults quickly, thereby saving time during repairs and reducing downtime experienced when trying to locate where an issue lies within a connection.
- Scalability: Patch panels have been designed with growth in mind, too; they can be expanded alongside other parts of the system. Whenever additional connections need managing due to expansion such that there is no need to redesign the whole setup again just because more points were added on some walls somewhere far off from the original location where the cabinet was placed initially.
- Better Signal Quality: Better performance and reliability during data transmission will only be achieved if high-quality connectors are used together with neatly organized cabling systems since this reduces signal loss as well as crosstalk between different lines carrying signals at the same time while within one cable sheath or bundle. This becomes even more crucial especially when dealing with high-speed networks where maintaining integrity remains vital throughout the entire path traversed by each packet being sent or received over such links
- Less Expensive Maintenance: Centrally managing all cables using patch panels may cut down the overall cost associated with maintaining networks. Changes and fixes can be made without having to redo many wires, thus saving both time and resources for other tasks like monitoring performance levels regularly to detect any anomalies early enough before they negatively affect user experience over long periods.
Therefore, these benefits should not go unrecognized by anyone who manages their own IT infrastructure.
What is the Difference Between a Patch Panel and a Switch?
Comparing Functions: Patch Panel vs Switch
Patch Panel:
Function:
- The purpose of a patch panel is to act as a passive device for managing and organizing cables.
- They are commonly used to connect incoming and outgoing network lines together.
Role in the Network:
- It allows for network connections to be easily reconfigured.
- Troubleshooting is made easier by creating one place where all cables can be seen.
- It does not process or route data; it is only responsible for physical cable management.
Switch:
- Function:
- A switch functions as an active device that receives, processes, and forwards data packets.
- To direct data to specific devices within a network, it uses MAC addresses.
- Role in the Network:
- By reducing data collision and increasing transfer speed switches improves network efficiency
- Some other features provided by switches often include VLAN support, Quality of Service (QoS), and port mirroring
For segmenting networks and managing data traffic appropriately essential
How Each Fits into Your Network Setup
Including both patch panels and switches in your network setup creates a streamlined system for data traffic management and organization maintenance. A patch panel acts as the central point for all your cabling needs, allowing you to easily manage and reconfigure network connections. It simplifies troubleshooting by putting all cables in one location, which also reduces cable clutter while providing an organized framework that makes it easy to maintain and expand.
Conversely, switches are important active components that improve your network’s functionality by sending packets of data to their rightful destinations using MAC addresses. They prevent data collisions and enhance the overall performance of the entire network through efficient control and distribution of traffic between different points. Additionally, most switches have advanced features such as VLAN support, Quality of Service (QoS), and port mirroring, which enable network segmentation, prioritization of critical traffic, and better diagnosis.
In summary, without a patch panel, it would be impossible to physically lay out or organize your network, while without switches, data flow cannot be optimized, leading to poor communication between devices and thus rendering them inefficient. Therefore, these two are necessary for any structured cabling design so that they can act together as a backbone for robust networking infrastructure.
When to Use a Patch Panel and When to Use a Switch
Differentiating between patch panels and switches in a network is key when figuring out how to use them.
When many network cables need to be managed or organized in one place, a patch panel must be used. It allows the user to see where connections are made easily, change them quickly if necessary, and find problems quickly. This is particularly helpful in data centers or large office buildings where frequent network reconfigurations take place.
On the other hand, a switch actively directs data traffic through the system. Use it if you want to send packets only to certain devices on your network with accuracy, prevent congestion from occurring in any part of the LAN, and ensure overall efficiency of all attached storage devices’ access time. Without switches, there would be no way for multiple devices connected by wires to communicate at once efficiently – this makes them perfect for enterprise networks where routing needs to change dynamically or environments with heavy demand for continuous high-speed transmission of files between computers.
In conclusion, so as not get confused let us keep cable structures clean using patch panels while switches are responsible for managing traffic flow across networks thereby enhancing performance optimization on such systems together.
How to Use a Patch Panel in Your Network Installation
Steps to Install a Patch Panel Properly
- Design the layout: Start by designing the structure of your network, which should include a patch panel, switch, and other devices. Then, decide on the type of cabling and connectors you will use.
- Fix the Patch Panel: Install the patch panel firmly on a rack or wall mount bracket. Make sure that it is located so that cable connections can be easily accessed on the front and rear sides.
- Label Ports: Name each port on the patch panel according to which device or workstation it is connected to; this helps in easy identification and management.
- Prepare Cables: Measure and cut network cables to the required lengths, leaving some slack for future adjustments, if necessary. Remove the outer jacket from the cables to expose individual wires.
- Terminate Cables: Join individual wires with appropriate terminals at the backside of the patch panel using a punch-down tool, following the color-code wiring scheme (TIA/EIA-568A or TIA/EIA-568B) for the correct connection.
- Check Connections: Use a cable tester to verify continuity and proper signal transmission of each connection after termination. Rectify any problem found during testing.
- Connect Devices To Network : Use patch cables to link front ports of patch panel with corresponding ports on switch or other network devices; ensure each connection matches earlier done labeling.
- Cable Organizing And Management: Arrange neatly cables by employing different cable management accessories like cable ties, Velcro straps, cable trays, etc.; keep them well organized so as to ease future maintenance activities as well as troubleshooting procedures
- Document Configuration: Record detailed information about how you have configured your cabling system, including the layout of the panels, labeling methods used, and points where connections were made. This will help during future modifications and when troubleshooting the network.
By following these steps you will be able to install your patch panel in an ordered manner which contributes towards creation a good network infrastructure that is easy to manage.
Best Practices for Connecting Cables
- Use Quality Cables: Make sure you use top-notch cords that meet the standards of the industry. If you employ second-rate cables, they may begin to cause connection problems and signal loss over time.
- Avoid Sharp Bends: Do not make sharp bends while routing cables as it can damage the wire or affect its performance. Keep recommended bend radius intact so as not to compromise any wires inside.
- Use Proper Lengths: Measure and cut cables to appropriate lengths, leaving some space for future adjustments if necessary. It is also important to note that too much slack caused by very long cables can lead to messy cable management.
- Label Cables Clearly: Always label both ends of every cable consistently. This will make it easier for someone else or even yourself to troubleshoot which wire goes where, especially when dealing with complex network setups.
- Implement Cable Management Tools: Use solutions such as cable ties, Velcro straps, and cable trays, among others, to organize your wires better and maintain them easily. Managing them well will also prevent tangling, thus reducing stress on the cables themselves.
- Separate Power and Data Cables: To prevent electromagnetic interference, keep power cords away from data ones. If necessary, you can use different conduits or cable trays.
- Regular Maintenance Checks: Occasionally examine your cabling system just to ensure all connections are tight and cables are in good shape generally. This way wear or tear can always be identified early enough before it becomes a bigger problem for the network later on
By following these guidelines, one can establish a reliable cabling infrastructure that supports long-term performance of their network while at the same time being easy to manage.
Maintenance Tips for Keeping Your Patch Panel Efficient
In order to make sure that your patch panel is efficient and always working, here are some tips for its maintenance:
- Regular Checks: Carry out regular checks on the patch panel to see if it has been damaged in any way, if there are any loose connections or worn out parts. This can help prevent network breakdowns by detecting and dealing with potential problems early enough.
- Clean the Connections: Dust particles and other dirt may hinder proper connection between ports and connectors, interfering with communication. It is, therefore, important to keep these areas clean using the right tools and methods that will not only clean but also secure them.
- Cable Organization: Arrange cables neatly by adopting structured cable management techniques. Use cable ties and management panels to avoid tangling, which might lead to unnecessary pressure on wires.
- Label Everything: Make sure that every cable is labeled on both ends. This will not only help in quick problem fixing but also ease upgrades or other maintenance exercises.
- Temperature Regulations: Control temperature and humidity levels to create an appropriate atmosphere. Overheating can lower the performance and life span of your patch panel, among other related accessories.
- Monitor Performance: Monitor your system’s performance through various network monitoring tools. These tools can warn you whenever there is a slight degradation. With such an approach, you can act promptly by making necessary corrections during maintenance.
With these hints for maintaining a patch panel, it will serve you longer, work better and ensure smooth running of your network all along.
How Many Ports Do You Need on a Switch or Patch Panel?
Calculating the Number of Needed Ports
The number of ports required on a switch or patch panel can be determined by considering current and future network needs. I look at the number of devices connected, such as computers, printers, and other peripherals requiring network access. It is important to take into account any planned expansion or additional device integration later on.
I have discovered from major websites that extra ports should be included according to the best practices. This creates flexibility and scalability which helps in avoiding immediate upgrades as the network expands. As an example, if I have 20 devices now; there is a chance that I might choose either 24-port or even 48-port switches/patch panels for growth and redundancy. What’s more, I consider bandwidth requirements together with the types of connections necessary, like (Gigabit Ethernet or PoE) before making my decision based on this information.
So basically what happens here is that by doing all these things I can easily establish how many ports are needed hence ensuring that a strong scalable and future-proof infrastructure for networking is achieved
Choosing the Right Size for Your Network
To right-size your network, start by determining what your current network needs. The initial move, according to most reputable sources, is taking an inventory of all devices currently in existence that will need access to the internet, including computers, printers and IoT devices among others. Also consider plans for growth; this means extra gadgets or potential expansion should be provided for in terms of ports when choosing switches and patch panels — experts recommend 20% – 30% more than what you have now lest it becomes inadequate with time due to unexpected developments. For example, if 20 units are required at present, then it would be wise to select either a 24-port switch or even go for a 48-port one. Bandwidth demand and connection types like Gigabit Ethernet or Power over Ethernet (PoE) should not also be overlooked. Hence, they must be considered if higher amounts are necessary in terms of data throughput as well as power supply by your network. Such an inclusive strategy backed up by advice given through leading industry insiders will enable you to come up with an expandable yet effective system.
Upgrading Your Network Devices as Needs Change
It’s necessary to update network devices with the change of your requirements, so that you can keep a strong and high working infrastructure. You should start by making a regular assessment of what is already there in order to know which parts are not functioning well or have become outdated. For example, switch over to those systems that support new communication standards like 10 Gigabit Ethernet or Wi-Fi 6 since they increase the speed of connection among different devices within one network. Another point worth considering is investing in modular equipment, which allows adding features stepwise without replacing everything at once; this helps in saving both time and money spent during the upgrading process. Ensure that you choose hardware with more advanced security options as well as remote management capabilities for protecting against any threats while simplifying operational procedures. These tips have been shared from leading industry sites, so following them will make sure your network stays flexible enough for future needs, too.
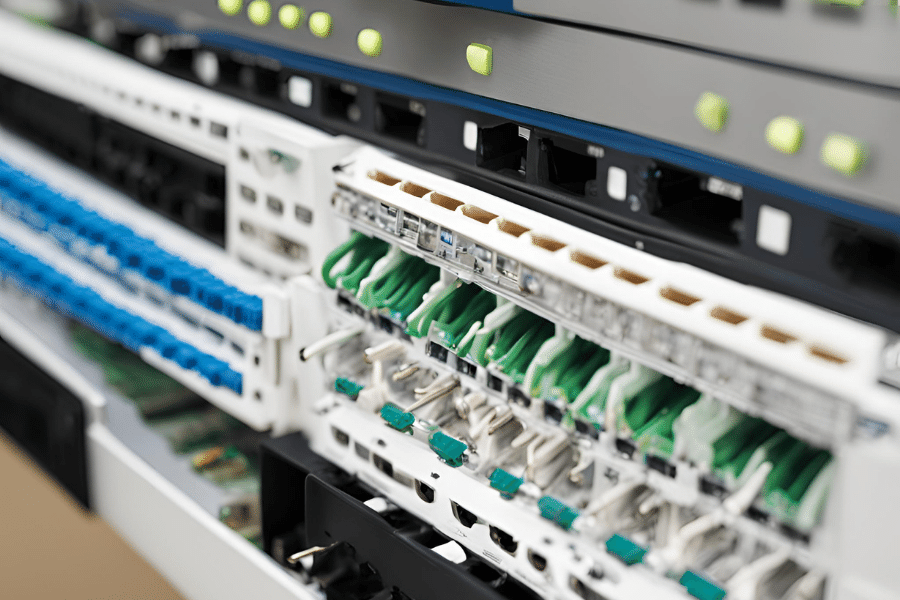
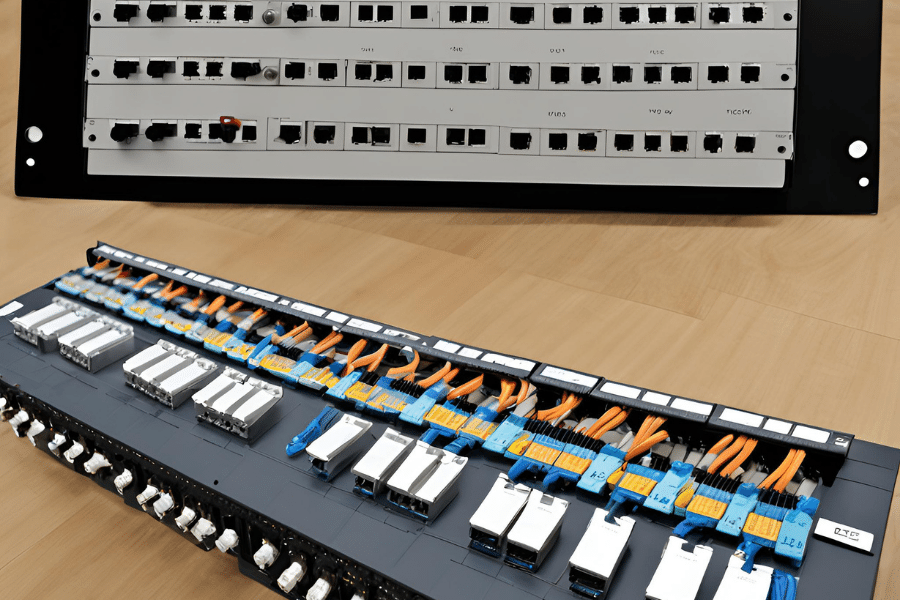
What is a Fiber Optic Patch Panel and When is it Necessary?
Introduction to Fiber Optic Technology
Fiber optic technology employs sending data as light pulses via thin glass or plastic fibers. This allows for extremely fast data transfer over long distances, which is crucial for modern networking. Lower latency and higher bandwidth are usually exhibited by fiber optics compared to traditional copper cables; thus, they are ideal for applications with high demand, like data centers, telecommunications, and advanced network infrastructures.
In a fiber optic network, a fiber optic patch panel acts as an important piece of equipment where fiber cables can be terminated, managed, and connected to other network devices from one central location. It arranges and protects the fibers thereby allowing easy handling of intricate connections between them. When there is a need to deal with multiple fiber connections systematically while still keeping up the performance standards of the network, this is typically when we need a fiber optic patch panel. This device becomes very useful in environments that require high-density cabling solutions together with accurate organization, such as enterprise networks and data centers.
Advantages of Using a Fiber Optic Patch Panel
There are many benefits to using a fiber-optic patch panel that make network management easier and more efficient. The first one is that it greatly improves cable organization and management. This means that instead of having multiple fiber connections in different places, they can all be brought together into one interface, making them easy to follow up on without tangling or misplacing them. secondly, a patch panel permits networks to be reconfigured or changed quickly, thus facilitating maintenance and troubleshooting with minimal interruption. In addition, it also ensures network reliability by keeping the right bend radius as well as securing terminations so as not to lose signals which may degrade performance too. Last but not least, these devices contribute towards the best possible levels of efficiency, scalability, and longevity for any high-performance networking environment where they are utilized most effectively possible. Optic panels should, therefore, ensure that all these elements are achieved at once.
Scenarios for Implementing Fiber Optic Solutionsleast
Various situations could benefit from fiber optic solutions, especially those necessitating high bandwidth and long-range signal transmission. One major application is in enterprise networking where large-scale data transfer is critical for high-speed internet connection. Data centers use fiber optics heavily to allow for massive amounts of data flow between servers and storage systems which ensures fast and reliable communication. Another significant area is telecommunications, where optical fibers are used to provide television, telephone service as well as high-speed internet directly into homes or businesses via FTTH (Fiber To The Home) and FTTB (Fiber To The Building) installations, respectively. Also, medical establishments, along with research institutions, among other industries, utilize this technology because it offers precise electromagnetic interference reduction capabilities during fast-paced information procedures. These uses indicate that fiber optics still play an indispensable role in modern networks designed for maximum performance.
Common Issues with Patch Panels and How to Troubleshoot Them
Identifying Connection Problems
Problems connecting patch panels may have diverse origins but usually fall into three broad categories: physical damage, incorrect cable management, and connector problems.
- Physical Damage: Check for any signs of wear on the patch panel itself or its cables. For instance, cables with frayed ends should be replaced, damaged ports should also be replaced, and bent connectors can interrupt signal transmission, leading to connectivity issues.
- Incorrect Cable Management: Disorganized cables can strain when they are bent or entangled. This will negatively affect their performance, so it is important to route and secure these cables properly.
- Connector Problems: Connectors might get loose or dirty after some time which results in intermittent or bad connections. Always inspect connectors for cleanliness regularly as well as making sure that they are well plugged into the correct ports.
By following good cable management practices and performing regular maintenance procedures, you can keep your patch panel systems working optimally.
Resolving Signal Loss in Patch Panels
The robustness and efficiency of a network can be greatly affected by signal loss in patch panels. Below are some ways to troubleshoot and solve this problem:
- Check for Connection Integrity: Ensure that all cables are securely attached and properly inserted into their ports. Loose connections may cause degradation or complete loss of signals. You can also test each connection’s connectivity using a network cable tester.
- Inspect for Physical Damage: Visually examine both the patch panel itself as well as the cables connected to it for any signs of physical damage like cuts, pinches or kinks – such damaged sections should be replaced immediately so that optimum transmission quality is restored.
- Evaluate Cable Quality and Length: Verify that you have chosen appropriate standard-compliant wires according to your specific networking requirements. Also, ensure that none exceed the recommended length limits since too much wire length can lead to signal attenuation.
- Clean Connectors and Ports: Over time, dust particles tend to accumulate within connector surfaces, hindering good contact and resulting in unstable connections; therefore, use suitable cleaning solutions/devices regularly on these points to maintain a clear path along which data signals pass through.
- Test for Interference: Sometimes external electromagnetic waves interfere with the proper propagation of information across a network, hence distorting its clarity at certain points only. Check out if nearby sources are generating such EMI, then try reducing their impact, e.g., by rerouting cables, using shielded ones, or even relocating patch panels further from those areas.
- Ensure Proper Labeling & Documentation: Accurate labels and correct documentation ensure faster identification/resolution of problems related to wrong cabling or misconfigured ports; thus, always label everything correctly, which will facilitate quick troubleshooting during maintenance operations.
By implementing these methods, one can prevent/minimize signal losses within patch panels, thus enhancing the overall performance capabilities inherent in network infrastructure.
Ensuring Proper Termination of Cables
These steps are to be followed for the proper termination of cables:
- Invest in Good Termination Tools: Some crimpers, punch-down tools, or cable testers are required. Accuracy is a result of precision tools which in turn leads to fewer mistakes during terminations.
- Observe the Manufacturer’s Instructions: The suggested termination methods by the cable and connector manufacturers should be followed strictly. This includes using the right wiring sequence and the recommended stripping lengths for cables.
- Preserve Pair Twists: When terminating twisted pair cables, all the twists must be maintained as close as possible to where they terminate. This reduces cross-talk between different pairs and preserves signal quality.
- Guarantee Strong Connections: Ensure that each wire is firmly connected into its correct slot without any insulation being caught up within the terminals; otherwise intermittent connection may occur causing signal degradation.
- Use Modular Plugs and Jacks: All conductors should be pushed fully inside connectors, and the locking tab should be engaged as required in modular plugs or jacks so that wires do not slip out, thus maintaining a reliable connection.
- Test The Termination: After finishing one end with another or at both ends, using a cable tester, check continuity through the proper wiring sequence without short circuits or open connections. This step will tell you if the terminated cable is ready for best performance or not.
Such practices guarantee dependable and efficient network infrastructure health through reliable terminations of cables.
Frequently Asked Questions (FAQs)
Q: What is the difference between a switch and a patch panel?
A: A patch panel can be used for terminating and managing cables to ensure that different network devices are connected in an organized, efficient manner. On the other hand, a switch is a hardware device that facilitates data routing between the ports under its control, thus enabling communication amongst linked devices.
Q: When should I use a patch panel?
A: Normally, you would use patch panels in office networks or data centers where many cable runs have to be organized and managed. It keeps wiring neat and makes changes or additions to the network infrastructure easier to handle.
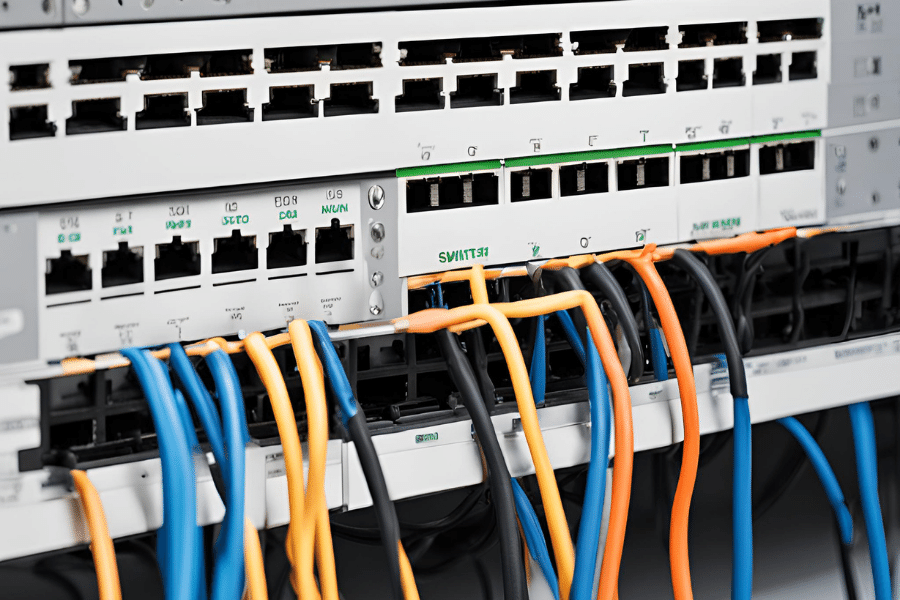
Q: How do a patch panel and switch work together?
A: The patch panel serves as a terminating point for network cables within a network setup. These cables are then plugged into switch ports on the network switch, which takes care of transmitting and routing data between connected devices.
Q: What are some advantages of using fiber patch panels?
A: Fiber optic cables need orderly termination and management, both of which are provided by fiber patch panels. This ensures quality transmission with minimum signal loss, which is very significant in high-speed environments like large enterprise networks or data centres.
Q: Can I connect an ethernet patch panel directly to an ethernet switch?
A: Yes, it is possible to connect an ethernet patch panel straight into an ethernet switch using appropriate-length patch cords. This arrangement improves cable management while also simplifying the modifications within your network configuration.
Q: What should I consider when installing patch panels?
A: Consider where your networking equipment will be placed, what types/lengths of Ethernet cable you plan on using throughout your setup & how best to mount these boxes so they are easily accessible yet out-of-the-way – this way, good planning can help with cable organization while maximizing speed!
Q: What is the effect of using a patch panel on network performance?
A: Network performance can be increased by using a patch panel. This is done through neat and secure connections, reducing damaged cables risk, and allowing for easy maintenance or upgrades which leads to a reliable and efficient infrastructure.
Q: What function does a network switch serve in data transmission?
A: A network switch contributes greatly towards data transmission as it directs data packets between connected devices based on their MAC addresses. Such intelligent routing improves speed and reliability of overall network within LAN (Local Area Network).
Q: Why should cable management be considered during network installations?
A: Cable management must be prioritized during network installations so as to keep everything organized and efficient. It ensures that no cable gets damaged, makes troubleshooting less complicated and guarantees smooth operation of the entire system.
Q: How do I choose between using a switch or a patch panel?
A: When choosing between employing either device i.e., switcher or patch panel; one has to consider what exactly they want from their networks. If multiple cable runs need managing then go for the latter while former works best for data routing plus managing various network connections; nevertheless in most cases both are necessary for an effective solution.